Chicken & Biscuits…

Last week was rainy and chilly in San Francisco, so it gave me the hankering for some good southern cooking.  This is SO not on the diet plan!  Perfect reason to have a dinner party and not be faced with the remaining leftovers.  I think with all of the Aids Lifecycle training that I’ve started I can afford a little bit of naughty.

I posted on my Facebook a bit a go that I was on a mission to make the perfect pot pie and during this process came up with something I really like – Chicken & Biscuits.  The taste is very similar, but this is designed for a larger crowd.  I don’t know about you, but when I get a pot pie I like them only big enough for one.  I think that size of pot pie has perfect crust to filling ratio.

Basically my Chicken & Biscuits is the filling of a chicken pot pie, but instead of baking it inside of a pie crust I serve it with biscuits.   I don’t usually have the time to make the biscuits and think the store bought are pretty yummy.

My recipe is below and I love to serve this with some risotto!

Here’s what ya need:

  • 6 chicken breasts – with the skin on and bone still in
  • 4 ½ cups of chicken stock
  • 1/3 cup heavy cream
  • 2 chicken bouillon cubes
  • Olive oil
  • ¾ cup of flour
  • 2 sticks unsalted butter
  • 2 yellow onions chopped
  • 5 carrots diced
  • 1 10 ounce package frozen peas
  • 1 ½ cups of frozen pearl onions
  • ½ cup parsley minced
  • Big pinch of cayenne pepper
  • Salt and pepper
  • 1 package of 8 biscuits

Preheat the oven to 350 degrees.

Rinse and dry the chicken.  Rub with olive oil and season with salt & pepper.  Roast these skin side up for 40 minutes.  While the chicken is cooking chop your veggies.  Once the chicken is done, let it cool for about 15 minutes and then remove the skin and the chicken from the bone.  Cut into large bite size pieces.

In a saucepan add the chicken stock and bouillon cubes, heat over medium heat until the cubes dissolve.  Once dissolved reduce heat to low and just keep the stock warm.

In a casserole add 1 ½ sticks of butter and then onions and carrots.  Cook over medium heat until the onions are translucent, takes about 15 minutes.  Now add the flour and cook for 3 minutes.  Slowly add the chicken stock while whisking.  Adding it slowly will reduce the potential for lumps.  Add the chicken, cream, remaining butter, onions, peas, parsley and  cook for 5 minutes.  Add the cayenne pepper and season with salt and pepper to taste.

Now remove from heat and place the biscuits on top of the chicken mixture.  Bake for 25 to 30 minutes or until the biscuits are done.

Chicken Curry Salad…

This past week was a killer!  I’ve started to train for the Aids Lifecycle once again and also preparing for the upcoming bathing suit season.  The day job has kicked back into full swing and folks are hiring again.  The combination of training and work is exhausting!

When I got home one night this week nothing sounded good to eat and I was being too lazy to invest any real length of time into cooking.  What to do what to do.  I was thinking it would be good to have something to take for lunch the next day because lord knows the restaurants around the office get old.  The dilemma grows.

Inspiration struck and it struck in the form of curry and pita bread.  I just needed to figure out what to make with the two.  Chicken had been on sale the week before and I had several breasts in the freezer, so the solution is Curry Chicken Salad.

Most chicken curry salad recipes call for chutney, but the bf is deathly allergic to mango’s, so this reflects my desire to not kill him.  This is simple, requires little labor and is tasty.  It truly does taste better the longer it sits, so it’s great to make for lunch.

Ingredients

  • 6  chicken breasts, bone-in, skin-on
  • Olive oil
  • Kosher salt and freshly ground black pepper
  • 1 1/2 cups light mayonnaise
  • 1/3 cup chicken stock
  • 2 tablespoons orange marmalade
  • 3 tablespoons curry powder
  • 2 stocks of celery, diced
  • 2 chopped scallions
  • 1/3 cup raisins
  • 1 cup whole roasted, salted cashews

Directions

Preheat the oven to 350 degrees F.

Place the chicken breasts on a sheet pan and rub the skin with olive oil and season with salt & pepper.  Roast the chicken for 40 minutes.  Remove from oven and let cool for about 15 to 20 minutes.  Once it is cool remove skin, remove chicken from the bones and then cut into bite-size pieces.

While the chicken is cooking you can combine in a large mixing bowl the mayonnaise, marmalade, chicken stock, curry powder, 2 teaspoons salt and 1 teaspoon black pepper.  Whisk until fully combined. Then add the chicken, celery, raisins, scallions and cashews. Mix until everything is equally coated.

You can serve now, but it’s better to let it rest in the fridge for a few hours.  To serve I cut a pita in half and filled it up with the curry chicken salad.  It’s good stuff!!

Who knew the balls were so big…

One of the holiday parties that I went to this past season was the boyfriends work party.  The party was a pot luck and those doctors and nurses did it right.   There was a very wide range of dishes – sashimi, lumpias, ham, cakes, pies and on and on.  The show stealer of the night was this amazing couscous salad.

This was no ordinary couscous salad.  The couscous was about 10 times the size of normal couscous, who knew the couscous balls could be so big.  Now I’m not a total size queen, but this changed the texture and the taste of the dish.  Apparently this is a special type of couscous called Israeli Couscous.  The balls are almost the size of peas!  Those Israeli’s are clever and packing.

The boyfriend persuaded his colleague to email us the recipe and I thought of a few modifications.  I really wanted to be able to eat this as a meal and not just a side salad.  The addition of the chicken helped with that.

Here goes:

  • 4 chicken breasts with bone in and skin on
  • 1 garlic clove
  • 3 tablespoons fresh lemon juice
  • 1 teaspoon dijon mustard
  • 1/2 cup extra virgin olive oil
  • 2 1/2 cups low sodium vegetable stock
  • 6 ounces Israeli Couscous
  • 2 cups snow peas
  • 2 cups cherry tomatoes – cut in half
  • 2 cups English cucumber- seeded and diced
  • 1/2 cup Kalamata olives – pitted and cut in half
  • 2 large green onions – diced
  • 1/4 cup fresh mint leaves  – minced
  • 6 ounces crumbled Feta cheese

Preheat the oven to 350 degrees F.

Place the chicken breasts, skin side up, on a sheet pan and rub them with olive oil. Sprinkle generously with salt and pepper. Roast for 35 to 40 minutes, until the chicken is cooked through. Set aside until cool.

While the chicken is cooking bring the vegetable broth to a boil in a medium sauce pan.  Mix in couscous.  Cover it, reduce the heat to low and leave it alone for 10 minutes.  Once it’s finished transfer it into a large mixing bowl, season to taste with salt & pepper then set aside until the chicken is ready.

Now while the couscous is doing it’s thing you can get the veggies ready.  Dice, mince and chop them all and combine them in a bowl (NOT the garlic and lemon).

Once the chicken is cooked  let it cool for about 10 minutes.  Once cooled remove the skin and the chicken from the bone.  Cut the chicken into bite size pieces.  Combine the chicken with the couscous and then add the veggies.

In a small bowl add the garlic, lemon juice and mustard.  Wisk in the olive oil.  Season with salt & pepper to taste.  Pour the dressing over the couscous and mix.  Gently fold in the crumbled Feta.  Taste to make sure it’s seasoned appropriately.

This can be served right away, but tastes much better the longer it sets.  I suggest making it the day before you are going to serve it.

This is also fairly healthy!

New year, new decade, new diet…

Well it’s almost here…2010!  I am very excited to put 2009 behind me and start the New Year and the new decade.  A fresh outlook and a fresh start on so many different aspects of my life – one of which is the diet.  I’m sure I am not alone on wanting to focus on eating better.  As usual the holidays have packed on the calories and I have not been as focused on hitting the gym.  Lord knows it will be bathing suit season before ya know it…so let’s get this started.

My main focus with my diet is to cut out the fat, increase the protein and still really enjoy what I’m eating.  A big goal is to stop eating lunch out every day at work and to reduce the intake of processed foods.  My calorie intake still needs to remain high to allow muscle growth, but with some planning there is a way to do both.

I found this amazing recipe in the September 2009 issue of Men’s Health.  Makes 4 servings and has 540 calories, 40g protein, 57g carbs and only 19g fat!  The taste is amazing and it’s actually one of my boyfriend’s favorite dishes that I make.

The Soba noodles are very important in this dish.  They are a Japanese noodle made from buckwheat.

Beef and Soba Salad

  • 8 oz shiitake mushrooms
  • 1 tbsp olive oil
  • 1 bunch asparagus
  • 8 oz soba noodles
  • 1 tbsp minced ginger
  • 1 clove garlic minced
  • ¼ cup soy sauce
  • 1 tbsp honey
  • 1 ½ tbsp Dijon mustard
  • 1 lb flank steak
  • 2 tbsp sesame seeds
  • 2 bunches chopped scallions

Oven to 300 degrees

Toss shiitakes with olive oil, spread out evenly on a baking sheet and season with salt & pepper.  Bake for 25 minutes.  Once cool cut into strips.

Add sesame seeds to small dry skillet.  Do not add olive oil.  Heat them over medium high heat for a few minutes to toast.  Careful, they will burn easily.

In a large pot bring salted water to boil.

While waiting for the water to boil, season the flank steak with salt and pepper.  On a grill or grilling pan grill the flank steak, should take just about 4 minutes on each side.  Once grilled, wrap in aluminum foil and let rest for at least 10 minutes.  Then cut into strips – cut against the grain for tender pieces of meat.

If you have space on the grill/grill pan you can add the asparagus. If not, just grill after the steak.  Before adding to the grill, drizzle the asparagus with olive oil and season with salt & pepper.  When they are finished let them cool for a couple of minutes and then cut into 1 inch pieces.

By this point you water should be boiling.  Follow the instructions on the back of the Soba noodles.  Usually you only cook them for a couple of minutes.  Once they are cooked, drain and then toss asparagus and mushrooms with them.

In a bowl whisk ginger, garlic, soy sauce, honey and mustard.  Pour dressing over the soba noodles.  Top with beef, sesame seeds and scallions.

The dish also tastes great for the next couple of days.  I usually double the recipe and have plenty to eat on for a few days.

Lasagna…

Tonight is the first planning night for a big fundraiser for my Aids Lifecycle (ALC) team.  This is the third year that I’m participating in ALC and I’m already excited.  The event is in June and it’s a 7 day, 545 mile bike ride from San Francisco to Los Angeles.  No easy task, but the funds that are raised benefit HIV/AIDS organizations.  With all the cuts in funding they need the money now more than ever.  If you are able to, please make a donation at http://www.tofighthiv.org/goto/brandonmetcalf

So back to this amazing lasagna, the recipe below has a big short cut – using store bought pasta sauce.  Homemade pasta sauce takes a full day to make properly and is worth it – if you have time do it!  This quicker recipe will still take you a full two hours to make.  I really like the heat that the spicy red pepper pasta sauce gives.

Here goes..

3 – 8oz jars pasta sauce, I use 2 Classico Spicy Red Pepper and 1 Classico Four Cheese
1 – 12 oz can of tomato paste
2 medium green bell peppers, fine diced
2 small white onions, fine diced
1 lb italian sausage
1 lb ground beef 80/20
16 oz shredded mozzarella
15 oz ricotta
6 oz shredded parmesan cheese
1 box lasagna – I use the Barilla flat lasagna – you don’t have to boil it beforehand
1 egg
2 garlic cloves, minced
Unsalted butter
Olive Oil
Salt & pepper

Preheat oven to 375 degrees.

In a large sauce pan combine the 3 jars of pasta sauce and heat on low, stirring occasionally.

In a large skillet add 1 tablespoon of butter and 1 tablespoon of olive oil.  Heat on medium high heat until butter has melted and then add the bell peppers and onions.  Lightly season with salt and pepper.  Cook until onions are translucent and peppers are tender.  Remove heat and move into separate bowl.

Wipe out the skillet and then add the sausage and beef.  Cook on medium to high heat, breaking up the meat as it cooks.  When the meat is almost completely browned add the minced garlic and cook for another 3 minutes.  Remove to a strainer and let the grease drain out.

In a large bowl add the egg, ricotta, and ¾ of the parmesan cheese.  Stir until well blended.

Add the tomato paste to the pasta sauce and stir.  This will help to thicken the sauce so that it’s not too watery.

Ok now time to assemble.  Butter a 9 x 13 baking dish.  Coat the bottom of the pan with a thin layer of sauce.  Add 4 pieces of the lasagna.  Place the sautéed onions and pepper on top of this layer of lasagna.  Spead ½ the mozzarella cheese over the onions and peppers.  Add a layer of sauce over the mozzarella.  Add 4 more pieces of the lasagna.  Spread the meat mixture over the lasagna.  Add a layer of sauce over the meat mixture.  Now, you guessed it, add 4 more pieces of lasagna.  Spread the ricotta cheese mixture over the lasagna.  Add a layer of sauce over the meat mixture.  Add the remaining 4 pieces of lasagna.  Add sauce to cover all of the lasagna.  Spread the remaining parmesan cheese and mozzarella over the sauce.

Tent a sheet of aluminum foil over the lasagna and cook for 55 minutes.  Remove foil and cook for an additional 5 minutes.  I usually cut in about 2 inch squares.

The best hot chocolate ever…

Wow..I’ve been slacking with the blog!!  Let’s fix that today.  A friend Facebooked me this morning asking for help with making hot chocolate and I have a very simple recipe that is UHmazing!  With the holidays fast approaching and the cold winter weather upon us – this recipe is perfecto.

A few things to keep in mind – use the best chocolate you can find.  This makes a huge difference in the overall flavor and texture.  Also, using a really good vanilla extract is important.  I would also not substitute the whole milk or cream with lower fat % milk.  The addition of the coffee will give the hot chocolate a deeper richness of flavor.

3 cups whole milk
1 1/2 cups cream
4 ounces bittersweet chocolate, chopped
4 ounces milk chocolate, chopped
1 tablespoon sugar
1 teaspoon pure vanilla extract
1 teaspoon instant coffee

Add the cream and milk to a medium saucepan and heat to simmering.  Remove from heat and then add both chocolates.  After the chocolate melts add the vanilla, instant coffee and sugar.  Whip this together and then reheat to serving temperature.  Serve immediately.

A nice touch for serving this is to add a peppermint candy cane.

More holiday recipes will be blogged. 🙂

Thanksgiving…

I had a long blog written out explaining my meal for tomorrow, but decided to go in a different direction.  Thanksgiving is by far one of my favorite holidays of the year.  I’m very excited to be cooking up a huge feast for a group of friends and my boyfriend.  Turkey, stuffing, green beans,  mac & cheese, pumpkin roll and on and on and on.  I have already started cooking tonight, the turkey is brining away and I’ll be making the pumpkin roll in just a few minutes.

I decided to change this blog because while cooking the feast tomorrow brings me a lot of excitement, it also brings me a strong reminder of what the holiday really means.  It is so easy to get caught up in the daily trials and tribulations of life.  To think about what went wrong, what I need to do, to plan this or pick up that, to take things for granted and just assume things will continue to be the same.  Thanksgiving is about taking a moment and being thankful for your life.  Being thankful for those you love and for those who love you.  Life is busy, challenging and short – live it to the fullest and be thankful for all you have.

This year I am most thankful for those who I love.  With all of the ups and downs this year, the one thing that has always been there are my loved ones.  I am blessed to have them in my life and look forward to sharing many more memories with them.

Friendships have really changed this year, some have changed context, some are new, some have drifted a bit apart and some have gotten much closer.  I appreciate each of them and know that they have enriched my life and will continue to do so.

So tomorrow enjoy the food and take a moment to determine what you are most thankful for.

Happy Thanksgiving.

Wonderful rainy Sunday…

Yesterday turned out to be a deliciously wonderful rainy Sunday here in San Francisco.  The day started with brunch at Farmer Brown – soul food!  I can think of no other way to start the day than with Farmer Brown’s amazing brunch.  All you can eat scrumptious fried chicken, biscuits & gravy, perfectly cooked bacon, grits, amazing scrambled eggs and the urban decor…it’s a must try!  Needless to say after brunch all I wanted to do was to curl up on the sofa and watch some TV.

I found out that Ina Garten’s, The Barefoot Contessa, can be streamed right from the Food Network website.  I was so very excited!  In one of the shows she was making Pappa al Pomodoro, which is a classic tomato soup from the Tuscany region in Italy.   The soup is fairly simple to make and tastes out of this world.   This is my take on her recipe.

Pappa al Pomodoro

½ cup olive oil
3 carrots, peeled and diced
2 onions diced
4 cloves of garlic minced
1 28 ounce can of crush tomatoes
8 thick slices of bacon, chopped
1 bulb of fennel, diced
3 cups of ciabatta bread cut into 1 inch cubes
4 cups of chicken stock
½ cup red wine
1 cup of chopped basil
1 cup parmesan cheese
Salt & pepper

In a large casserole heat oil.  Add the carrots, fennel and onion and cook on medium heat for 5 minutes.  Add the garlic and cook for another 5 minutes.  While this is cooking brown the bacon in a separate skillet.  When the bacon is done add it to the casserole.  Add the ciabatta and cook for 5 minutes.  Now add the tomatoes, red wine, chicken stock, basil, 1 tablespoons of salt and 1 tablespoon of pepper.  Stir together and bring to boil.  Once boiling, reduce the heat and simmer partially covered for 20 minutes.  Add the parmesan cheese, stir and continue to simmer partially covered for another 25 minutes.

The soup is easy, delicious and satisfying.  It tastes even better the longer it sets.   Tonight I used the remaining ciabatta bread and made a grilled cheese with some really good cheddar cheese.  Perfection!

What’s with all the birthdays…

Talk about a week of birthdays – just about every night I was at a birthday dinner!  I’m glad December is a fairly low key birthday month, cuz September, October and November were just out of hand!  One of the birthdays was for a friend who requested that I cook for him instead of us going out.  Dinner was planned for a Monday night, so it needed to be amazing, but yet still quick enough to do after work.  Luckily I had been channel surfing over the weekend and PBS was broadcasting Chef Hubert Keller.

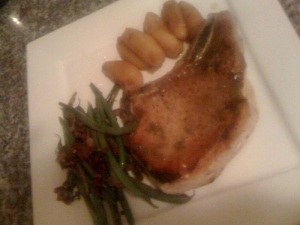
Chef Keller was making a delicious winter dish, Pork Chops with Calvados Sauce, Sauteed Apples with Roasted Cream Corn.  The recipe was simple, quick and looked outstanding!   I decided that I would make the apples and the pork, but I’ve never been a huge cream corn fan, so I made my sage & pancetta haircot vert instead.   The meal was perfecto.  The pork was perfectly cooked, the sauce was delicious and the overall flavor combinations of the different elements worked exquisitely.   Dinner was perfect and it was made more fun as we discussed the details of how each of us met and how we met the friends we know.   Let’s just say we shared the way some of our friends got to know each other!  Fun times for sure and great to get to know folks better.  My only wish is that I had a digital camera and didn’t need to rely on the iPhone for the picture of the delicious meal below.

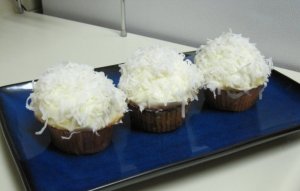
Today is my boyfriend’s birthday and to celebrate we are going to dinner at a restaurant close to his apartment and will follow that up with a cupcake party at his place.  He has asked that I make coconut cupcakes.   Now baking is probably my biggest weakness in the kitchen, I have this terrible habit of forgetting ingredients and the concept of measuring things exactly is foreign to me.  One time I attempted to make banana bread and as I was pulling the sad, flat, rubbery looking thing out of the oven, I noticed on my counter the egg that was supposed to be in it!

To help ensure that I don’t screw this up – because lord knows I will not be happy with myself unless it’s perfect – I am using a recipe I’ve always wanted to try, but was never given a good reason.  The recipe is from Ina Garten, who is one of my “go to” Chef’s!   She also has my life – well the life I feel I should have.  I mean a huge house in the Hamptons, cooking, TV, magazines, the barn and you know she has a martini or manhattan under the counter that she is sippin’ on in between takes. Her philosophy of really good ingredients cooked in a simple manner makes life a bit easier and 9 times out 10 the food is delicious.  The Coconut Cupcake recipe that I’m following has received tons of great reviews and I’m excited to get this one under my belt.

So after a little bit of effort the cupcakes are cooked, iced and topped with the coconut.  The frosting is delish!  It’s a cream cheese frosting and then you sprinkle the coconut on top.  Good stuff.  The cupcakes themselves, I would say are just alright – not bad, but also not a wow.  The guests arrive in a few hours, so we will see what their take on them is.  Regardless they look fantastic and I may succumb to just eating the frosting on all the remaining ones 🙂

The apprenticeship…

A big part of my move into the culinary world is making progress with formal training.  For the past few years I have weighed my options of the various culinary schools – so many choices, with so many different programs.  Confusing to say the least!  Over the past 6 months or so, I’ve really been networking with Executive Chefs, both here locally and across the country.  I have received consistent advice…to really learn how to become a great Chef does not mean going to an expensive culinary school, it means that I will eventually need to go to France or Italy for a bit.  Of course there is some pre-work prior to being ready for that.  The two big things that need to happen are obtaining an apprenticeship with a great Chef here locally and to learn either French or Italian or possibly both.

Anyone who is close to me knows that I’m a huge WAG fan – that’s short for Will & Grace in case you were not aware.  I mention this because the news that I received today deserves the proclamation that Jack makes when he enters the room imitating a cheerleader and proclaims “Big news! Hit it! B-I-G N-E-W-S. Big…news!”  I know..wow Mary..very gay.

I thought I had landed a great apprenticeship a few months back, but the Chef and I were just not compatible – he was a wee bit bat crazy!   So, I’m very excited to say that I have been chosen for an apprenticeship at a top rated French restaurant here in San Francisco.  The Executive Chef is highly accomplished – a winner of the James Beard Award and awards from numerous food magazines.  He has received an award from the French Government and his restaurants have received numerous awards.  He is also known for mentoring future successful chefs!  I start this weekend and I’m so excited!!  The Chef was born in France and still has a fairly thick French accent, so this should help with the second goal of learning French.

I’m very excited to be getting started and can’t wait to learn.  Of course, this doesn’t mean I will be leaving my day job anytime soon.  I love the people I work with and recruiting.  If anything it means more focus and determination for the next year or so, a long stint in France or Italy is not cheap!

I would imagine my learning should make for some interesting blogs!  Not to worry my friends who like to be my local guinea pigs – I will still making dinners for you try.